HoneySelect2Libido DX Screenshots
HoneySelect2Libido DX review
Deep-dive walkthrough, tips, and creative setup for HoneySelect2Libido DX
HoneySelect2Libido DX is a PC title that combines a dating-sim structure with deep character customization and intimate interactive scenes, offering players freedom to design characters and direct encounters. In this guide I walk you through the core systems, share hands-on tips from my own play sessions, and explain how to set up, progress, and personalize your experience in HoneySelect2Libido DX. If you enjoy building characters, unlocking new interactions, and optimizing scenes, this article will help you get started and level up efficiently.
Getting Started: Installation, Interface, and First Steps
So, you’ve got HoneySelect2Libido DX and you’re staring at the files, feeling that mix of excitement and “okay, now what?” 🤔 I’ve been there. The first launch can be a bit overwhelming with all its menus and options. But don’t worry! This guide will walk you through everything from a smooth HoneySelect2Libido DX installation to creating your first stunning character. Think of this as your friendly, no-nonsense starter kit to hitting the ground running.
System requirements and installation checklist
Before we dive into the fun stuff, let’s make sure your PC is ready to handle the game. Getting the system requirements HoneySelect2Libido DX needs right is the difference between a buttery-smooth experience and a frustrating slideshow. Based on my many, many hours, here’s what you’ll want.
The official specs will get you launched, but for a truly great time, aim higher. The game is surprisingly detailed, and those character models and textures need some muscle to shine.
Here’s a breakdown of what I recommend:
| Component | Minimum (Official) | Recommended (For a Great Experience) |
|---|---|---|
| OS | Windows 8.1 / 10 | Windows 10 64-bit or later |
| CPU | Intel Core i3 | Intel Core i5 / i7 or AMD Ryzen 5 equivalent |
| RAM | 4 GB | 8 GB or more |
| GPU | DirectX 11 compatible | NVIDIA GTX 1060 / RTX 2060 or AMD RX 580 equivalent |
| Storage | 20 GB free space | 40 GB+ on an SSD (load times matter!) |
Now, for the HoneySelect2Libido DX installation itself. It’s usually straightforward, but here’s my golden rule: always install to a simple, short folder path. Avoid deep directories like C:\Program Files\VeryLongFolderName\AnotherFolder\Game\. Instead, something like C:\Games\HoneySelect2LibidoDX\ is perfect. This prevents a ton of weird permission errors and mod issues down the line. After installation, a crucial step is to run the game’s initial setup utility (like InitSetting.exe) to configure your resolution and quality settings before the first launch.
🛠️ Pro Tip: Right-click the main game executable and select “Run as administrator” on your first go. This ensures all necessary registry entries and files are created without a hitch.
Once you’re installed, here’s my personal pre-launch checklist to optimize your session:
* Graphics Settings: In the InitSetting.exe, set Shadow Quality and Texture Quality to High if your GPU can handle it. Bloom and Depth of Field are personal taste—I turn them off for clarity.
* Keybinds: Open the in-game Settings later and check the Controls tab. I highly recommend noting the keys for Hide UI (F11) and Quick Save (F5).
* Display Mode: Decide if you’re playing in Windowed or Fullscreen. Windowed is great for multitasking, but Fullscreen might offer better performance.
* Backup Your Saves: Before you get too deep, copy the UserData folder from your game directory and paste it somewhere safe. This is your lifeline!
Navigating the main interface and menus
Alright, the game is installed and your settings are tuned. You hit play, and… welcome to the Lobby! 🎮 This is your home base, and the game interface HoneySelect2Libido DX presents can feel like a spaceship cockpit at first. I spent a good 15 minutes just cautiously clicking things. Let’s demystify it.
The main screen presents you with several door-like options. Here’s what’s behind each one:
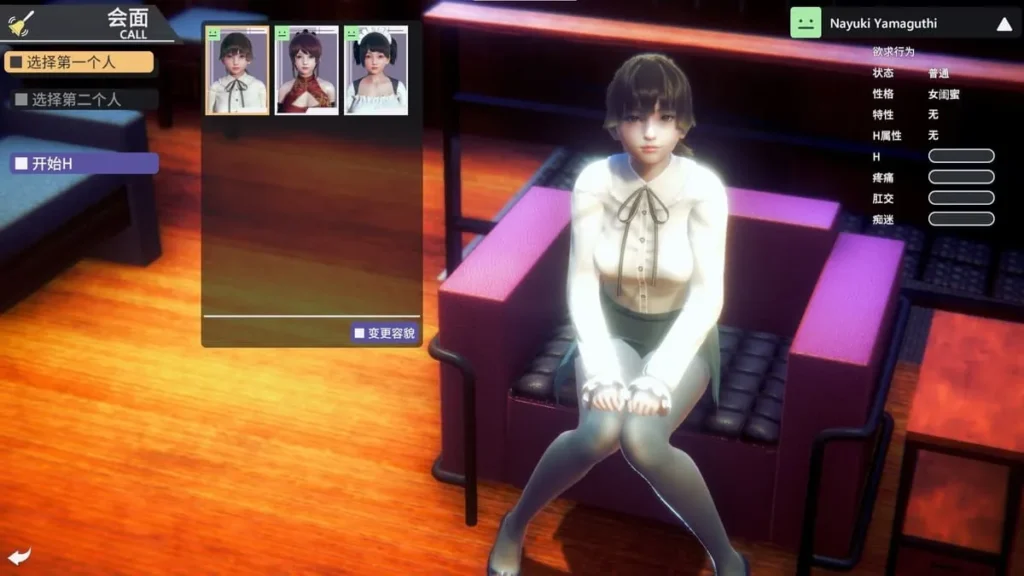
* Leave Room: This is your gateway to all the game’s primary modes and locations. Want to meet characters, explore stories, or access the main free-play scenes? This is your start button. It’s the core of how to start HoneySelect2Libido DX for any actual gameplay.
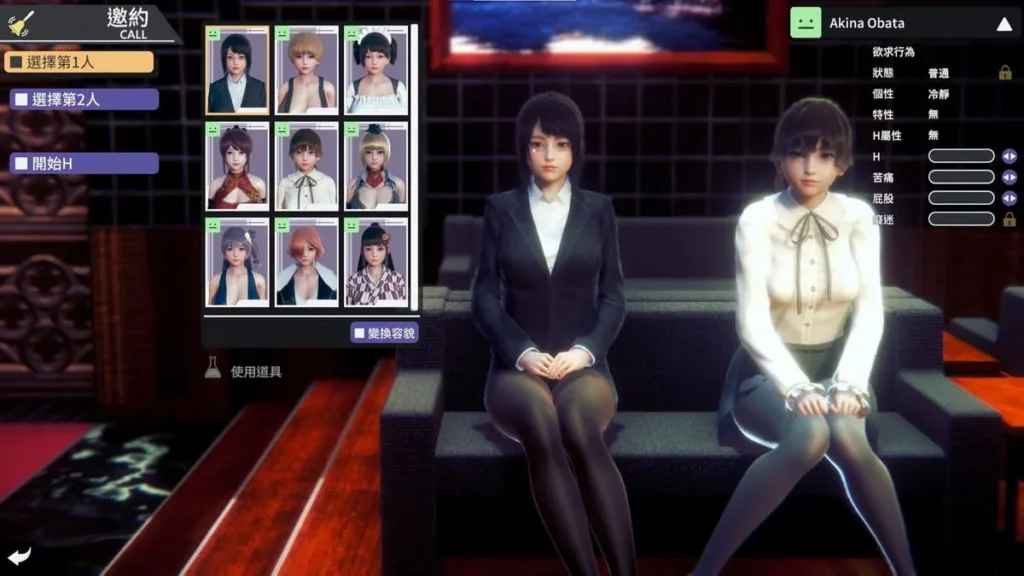
* Character: This is your studio. Here you can create character HoneySelect2Libido DX, edit existing ones, manage their outfits (called “coordinates”), and organize them into groups. You’ll live here almost as much as in the main scenes.
* Config: The settings menu. Graphics, sound, controls, and game-specific rules are here. Revisit this after playing a bit to fine-tune.
* Album: Where your screenshots are stored. Seriously, use the screenshot function (the camera icon or Print Screen key) often!
* Exit: Closes the game.
My personal “aha!” moment came when I realized the power of the Character menu sub-sections. I’d spent an hour crafting a perfect look, jumped into a scene, and then wanted to tweak her lip color. I had to exit the scene, go all the way back, find her, edit, save, and reload. It was a hassle. Then I learned this:
💡 The Coordinate (Outfit) Preset system is your best friend. When you make a character you love, immediately save her outfit as a preset within the Character Editor. Later, you can load that exact outfit onto any character in any scene in seconds, without having to exit. This one tip saved me countless hours.
First session: Creating your first character and entering the facility
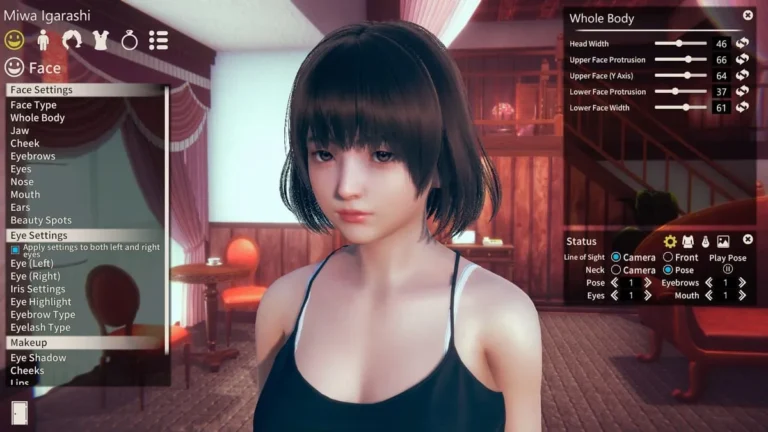
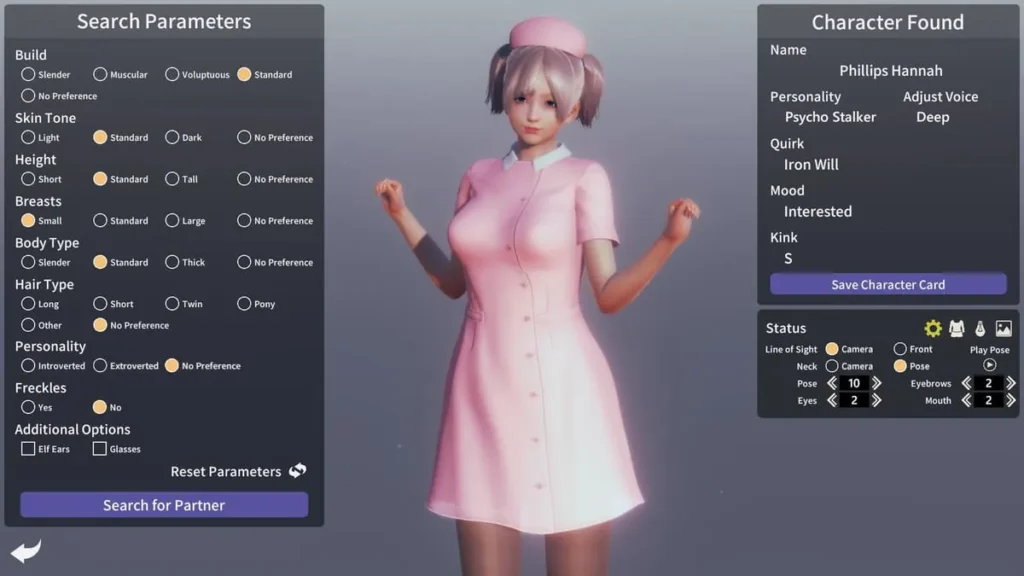
Now for the real magic. Click on Character from the Lobby. You’ll see options like “Edit Female” or “Edit Male.” Let’s focus on creating your first character. Click in, and prepare to be amazed (and maybe a little daunted) by the sheer number of sliders. 😅
The process to create character HoneySelect2Libido DX is deep, but let’s break it into stages:
1. Foundation: Start with the “Body” and “Face” tabs. Choose a base head model you like, then adjust the overall body shape, height, and proportions. Don’t get lost in the details yet!
2. Features: This is where personality blooms. Use the “Face” sliders for eyes, nose, mouth, and eyebrows. The “Hair” tab offers a huge variety of styles and colors. My insight: Spend time on the eyes and mouth shape—they convey the most character.
3. Polish: Skin details, makeup, and accessories add the final touch. The makeup system is incredibly layered, allowing for subtle or dramatic looks.
Once you have a character you’re happy with, you must save preset HoneySelect2Libido DX. Here’s how:
* In the Character Editor, look for the “Save” button (usually a floppy disk icon 💾).
* You can save the entire character as a Character Preset. This saves her face, body, and currently equipped outfit.
* Crucially, also save her current clothing as a Coordinate Preset. This is separate and allows you to mix and match outfits later.
* Give your presets clear, descriptive names! “BlackDress_Formal” is better than “Outfit01.”
After saving, you can assign her to a group for easy access. Now, you’re ready to actually play! Go back to the Lobby and select Leave Room. You’ll be asked to choose a character for the protagonist and then pick a location or mode to start in. This is the final step of how to start HoneySelect2Libido DX for a new session. I recommend starting with a simple free-roam location to get a feel for the controls and interactions without any pressure.
And there you have it! Your HoneySelect2Libido DX installation is complete, you’ve conquered the game interface HoneySelect2Libido DX, and you’ve brought your first unique character to life. Remember, experimentation is key. Save often, tweak freely, and don’t be afraid to start over—the creative process is half the fun. Now, go leave that room and see what adventures await! ✨
HoneySelect2Libido DX offers a flexible blend of character creation, interactive encounters, and progression systems that reward experimentation and personalization. By mastering the character creator, understanding the progression loop, and applying the scene and camera techniques outlined above, you can craft memorable sessions and speed up unlocks while avoiding common technical pitfalls. Try a focused play session using the recommended priorities, save coordinate presets early, and iterate on traits to discover emergent behaviors. If you enjoyed these tips, jump into the game with one small goal—create a character, unlock your first special map, and capture a scene you’re proud of.